Sunday, June 26, 2011

Twinkie Cake

Hi everyone, I hope your day is going great! Today I want to share a recipe that I found over at the SOUTHERN PLATE. It just looked to good not to try, so when I went grocery shopping I picked up the ingredients that I would need to make this.First off you will need a 9" x 13" cake pan. Than you unwrap all of your Twinkies. Now split nine of them in half lengthwise like I did this one.
Layer nine of the twinkies on the bottom of your pan and eat the tenth one! Actually, I did need all ten of the twinkies to fill the bottom of my cake pan. Here is that it will look like,
Now take your package of instant vanilla pudding and make that according to the package directions. Spread it on top of the twinkies.
Now add on top of the pudding, your drained pineapple. Forgot to get that picture.
Now slice up three to four large bananas, I tossed my banana slices in some lemon juice to keep them from turning brown. Than put on top of the pineapple.
Now take a container of Cool Whip, I used an 8 ounce one but next time I would up it to the 12 ounce size, spread the Cool Whip over the bananas.
Now sprinkle over the top some nuts for garnish and some Maraschino cherries too! Now here is what is looks like when you are all done making it look pretty!
Doesn't it look YUMMY!!!! The best part is, you don't have to heat up the oven to make this dessert, perfect for the summertime!
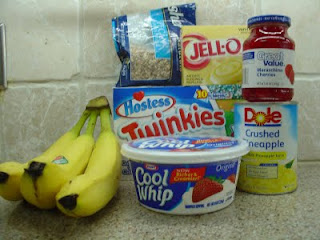
Twinkie Cake
1 box (10) Hostess Twinkies
1 large box (5.1 ounce) INSTANT vanilla pudding, mixed according to package directions
1 can (20 ounces) crushed pineapple, drained
3 to 4 large bananas, sliced
1 container (8 ounce) Cool Whip, I would use 12 ounces instead
Maraschino Cherries, for garnish, drained well on paper towel
Nuts, for garnish
Remove Twinkie cakes from wrappers. Cut each in half lengthwise from top to bottom. Place Twinkie halves in 9" x 13" cake pan, with cream side facing up. Layer pudding, pineapple, bananas and Cool Whip over the Twinkies, in that order. Sprinkle with nuts and top with Maraschino cherries.

There you go a simple, easy to assemble dessert. Great for get-together. Left overs hold up very well, if there are any!!

Hope to see you back here soon! Mary
{Printer Friendly Version}

Saturday, June 25, 2011

Homemade White Bread in the Bread Machine

Have you ever ran out of bread before it was time to go grocery shopping? That is what happened to me earlier this week. So instead of running to the store and fighting with the crowd of people, I ran in the kitchen and pulled out my bread machine. Here is what you need, flour, oil, salt, yeast, sugar, water and bread flour. Recipe will be at the end of the post.
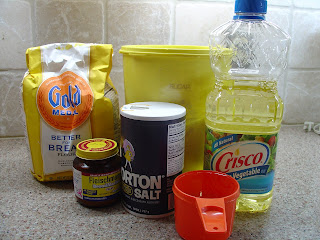
First you get warm tap water and put your sugar and yeast in, give it a stir and let it set for about 10 minutes. The sugar makes the yeast all happy and ...
this is what you will get! Don't make your water too hot or too cold, the yeast doesn't like either one of those. If you have done it right this is what it will look like.
Now pour in your yeast mixture. Than add the remaining ingredients. Set your bread machine to white or basic and press start. My bread machine lets me pick the crust color, so I chose light.
Here is what it looks like after it has been mixed and knead.
Here is what it looks like after it has risen.
Here is what it looks like after it is baked.....YUM!
An here is what it looks like on the inside, hmmm, it smells soooo good and taste just as good as it looks too!
Best Bread Machine Bread
1 cup warm water (110 degrees F/45 degrees C)
2 tablespoons white sugar
1 (.25 ounce) package bread machine yeast (that equals 2 1/4 teaspoons of dry yeast)
1/4 cup vegetable oil
3 cups bread flour
1 teaspoon salt
Place the water, sugar and yeast in the pan of the bread machine. Let the yeast dissolve and foam for 10 minutes. Add oil, flour and salt to the yeast. Select Basic or White bread setting, and press start. Will take 3 hours from start to finish. Makes 1 1/2 pound loaf of bread.

I found this recipe on Allrecipes.com

Hope you give this simple bread recipe a try, it is so good...thanks for dropping by! Mary
{Printer Friendly Version}

Thursday, June 23, 2011

Homemade Baker's Twine


Hi everyone! Today I'm going to share with you a tip/hint/idea that I found over on Spiltcoaststampers website, it is a card making, paper crafting community that anyone can join for free and I have found many wonderful ideas on it!
They talked about taking crochet thread
You take and wrap your thread around a rule like this
Than take your marker and draw lines across or diagonally across the thread, make sure to do both sides. I tried this with a Sharpie and a Stampin' Up! marker.
Than unwrap your thread. Here is what I found out. The Sharpie color the thread all the way through but the Stampin' Up! marker only color the top of the thread. So if you want to try this, go with a marker that has alcohol in it for it to work properly.

Here is a VIDEO that will show you how to do it too!

I hope you have enjoyed this tip on how to make your own baker's twine, thanks for stopping by and hope to see you again soon! Mary

Tuesday, June 21, 2011

How to Peel a Potato

OK, I bet when you saw the title, you were thinking to yourself, "come on lady, everyone knows how to peel a potato". Well, I just bet you that you haven't ever done it this way before! It is so easy that my friend, Chanda, uses this method when she makes her potato salad, just take a look at here blog, Sooooooo Not Betty! and her yummy potato salad recipe!

Now I'm not going to show you step by step with pictures, I'm going to give you a video link, Dawn Wells Potato Peeling so that you can view it over and over. It's a easy peasy way to peel your potatoes and not clog up your garage disposal and ending up having your potato salad costing $80.00 to unclog the drain, don't ask how I know all of this!

Well I hope you like this tip and let me know if you try it! Have a great day..............Mary

Sunday, June 19, 2011

Toaster Oven S'Mores

Today I want to share with you a recipe that is floating all over the internet and you will also see big displays in the grocery stores too....How to Make S'Mores. Now anybody that was a scout has had s'mores and anybody that has ever went camping has had s'mores but the one thing that is missing when you want to make them at any other time of the year is the camp fire! The heat is what make the chocolate all ooey and gooey and the marshmallow all soft and melted. Now they do have recipes for making them in the microwave but hey I like a little brown on my marshmallows and you just can't get that with the microwave. So the next best thing to the campfire is.....a oven!! Now I don't want to heat my big old oven up just for a few s'mores, so I get my handy dandy little toaster oven out and set it to broil. You know what the only thing missing from the camp fire ones is.....the smoke!


We all have the recipe ingrained into our brain of the ingredients we need for s'mores, Hershey chocolate bars, marshmallows and graham crackers, so easy that, well, a kid can make them!! Oh, they now have thin, square marshmallows made just for making s'mores!!

OK, let's get started. Set up your toaster oven and turn it on to broiler, that is what is going to make your marshmallows look toasty. I line my pan with foil. Than place some graham cracker squares on your pan, I leave room so that I can rotate them to get and even toasting. Now put your chocolate square onto of your graham cracker, now the marshmallow. 
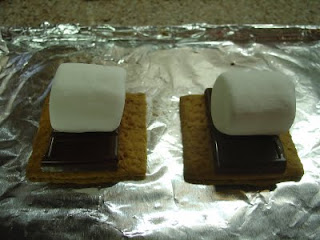
See how they are starting to brown just a bit.
It will only take about 4 to 5 minutes for the magic to happen, so watch carefully so you don't have a flame happen. There almost there, just a few seconds and I mean seconds more.....
There now they are done. When the marshmallows look the way you like them, remove them and put them on a plate.


Be careful because they will be hot and you don't want to burn your mouth because you know you will want more than one!
Ah...just the way we like them! Now hurry up and go make some so you can lick all the gooey goodness off your fingers!

I hope that you enjoy this great taste of the summer, but now can enjoy all year around! Hope you all give it a try, you won't be disappointed!! Mary

{Printer Friendly Version}

Wednesday, June 8, 2011

Quinoa and Black Beans


Hi everyone!! Today I would like to share a recipe that I found on Allrecipes, you can see the recipe HERE. Now I haven't ever tried quinoa before but have read what an excellent source of protein it is. In fact, it is the only grain that is a complete protein! I'm always on the look out for main dish recipes where I don't need to cook it in the oven, especially when the heat is near 100 degrees. Husband always says, "why heat up the house, just to cool it back down!" So I've had to become creative with making main dish meals thru the years.
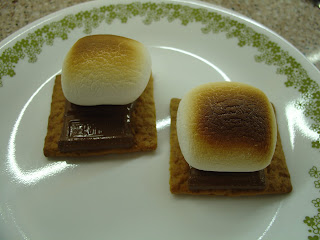
Now I'm new to this tutorial stuff, and I didn't take pictures of each step in making this dish, will try over time to do better. When making this recipe, I read some of the 1,552 reviews to see if I wanted to try it, with that many reviews and most were positive, I had to give it a go. Even thou the box of quinoa I bought stated that it was pre-rinsed, I let mine soak in water to cover for 15 minutes, than drained it, than I rinsed it for a total of three times, this is to make it softer and to remove the bitterness that some have experience when using this grain.

Quinoa and Black Beans
1 teaspoon vegetable oil, I used olive
1 small onion, chopped
3 cloves garlic, peeled and chopped, I'm lazy, I use the jar chopped garlic
3/4 cup uncooked quinoa
1 1/2 cup vegetable broth, can use chicken or even water
1 teaspoon ground cumin
1/4 teaspoon cayenne pepper, we are wimps, so I use 1/8 teaspoon
salt and pepper to taste, I went easy on the salt because of the broth
1 cup frozen corn kernels, can use canned
2 (15 ounce) cans black beans, rinsed and drained, I used only one can
1/2 cup chopped fresh cilantro
Heat the oil in a medium saucepan over medium heat. Stir in the onion and garlic, and saute until lightly browned.
Mix quinoa into the saucepan and cover with the vegetable broth. Season with cumin, cayenne pepper, salt, and pepper. Bring the mixture to a boil. Cover, reduce heat and simmer 20 minutes.
Stir frozen corn into the saucepan, and continue to simmer about 5 minutes until heated through. Mix in the black beans and cilantro.
There you have it, fairly simple to make and it doesn't heat up the house to make it.
Some of the reviewers suggestions were to serve cold, serve with salsa, serve with avocado and sour cream, etc.
How Did We Like IT??

One can of beans, I thought, was plenty for this recipe. My daughter liked it cold, I liked it warm with some salsa added to the top. Hubby was not impressed. So only you will know if you and your family would like this.

Thanks for stopping by! Mary

{Printer Friendly Version}

Monday, June 6, 2011

Welcome To My New Blog!

You are probably wondering "why does she need another blog?" Well my other blog, Mary's Craft Room ,has become a place where I mainly post my cards that I've been making. I thought that this blog would be a much better place to post my craft projects and recipes that I use or have found that I really like. Now I don't know how many times a week I will be posting on here, just have to wait and see. I do have a few craft projects that I've kinda have had on the back burner for awhile and hopefully this blog will get me more "inspired" to finish some of those crafty projects. All suggestions are welcome! Heck, I may even post pictures of an older desk that I want to refurbish for my daughter, on here. I found it on the curb, couldn't believe someone had it sitting out for bulk trash pick-up in our neighborhood! Anyway, I just wanted to say "HEY" to everyone and hope you all will come along on this crafty, recipe sharing journey with me! Oh and one other thing, please leave me comments, I really do enjoy hearing, good or bad, what you think, it will only make my blog better! Thanks.......Mary